Handmade Concrete Planters Using Recycled Plastic Molds
Tap into the desire for chic, budget-friendly balcony decor by framing concrete planters as an easy weekend project that transforms trash into sleek home accents.
Materials & Tools You'll Need
Gathering your supplies ahead of time makes the project go smoothly, and you’ll be happy to know that most items are likely already in your kitchen or recycling bin. Here’s everything to have on hand before you start mixing.
- Rapid-setting cement mix: Choose a fine, smooth cement without large aggregate—this isn’t the gritty concrete used for sidewalks. A patch or repair cement works beautifully because it picks up the smallest mold details and cures quickly.
- Water and a mixing container: An old bucket, large yogurt tub, or even a plastic takeout container works great. Just make sure it’s something you don’t mind sacrificing.
- Recycled plastic molds: Sturdy yogurt cups, deli tubs, and takeout containers are perfect. Their flexibility makes demolding easy, and you can reuse them multiple times. Look for interesting shapes and sizes.
- Release agent: A thin coat of cooking oil or petroleum jelly inside your molds prevents the cement from sticking. It’s simple and effective.
- Mixing stick: A paint stirrer, an old spatula, or a sturdy stick from the yard does the job. No fancy tools needed.
- Rubber gloves and a dust mask: Cement can be drying to the skin and dusty to breathe, so protect your hands and lungs. Safety first!
- Sandpaper (medium-grit): After curing, a quick sanding smooths any rough edges and gives your planter a polished finish.
- Optional extras: If you want to get creative, pick up some concrete pigment for color, a sealer to protect the surface, or small stones to improve drainage at the bottom of your planter.
Preparing Your Recycled Plastic Molds
The secret to a stress-free unmolding is picking the right container and prepping it well. Look for rigid plastic tubs, takeout boxes, or yogurt cups with smooth, straight or slightly tapered sides. Avoid anything with sharp undercuts or embossed logos—those spots will grab the concrete and make release a struggle. Once you’ve collected a pair (one larger for the outside, one smaller for the inner core), wash them with warm soapy water and dry thoroughly. Peel off any labels and scrub away adhesive residue so nothing interferes with the mold surface.
A thin release layer is your best friend. Dab a little vegetable oil, petroleum jelly, or dedicated mold release onto a paper towel and rub a sheer coat across all interior surfaces of the outer mold. Then lightly grease the outside of the inner mold. Too much lubricant can leave a dimpled finish, so buff away any excess.
For drainage, plan ahead so you don’t need to drill hardened concrete later. One easy trick: tape a short piece of drinking straw or a plastic pen cap to the bottom of the inner mold. As you pour, that indent remains, creating a perfect hole after de-molding. Alternatively, if your design allows, set an inverted tiny plastic cup against the base of the outer mold before pouring—just ensure it stays put.
Getting the wall thickness even makes your planter sturdy and professional. Center the inner mold carefully; aim for about ½ inch of space all around. Plastic spacers (like cut up takeout chopsticks or a few folded cardboard shims) can help hold the inner mold steady while you pour. Once everything is aligned, give the mold a gentle tap on your work surface to release air bubbles. Now you’re all set to mix and pour your concrete.
Mixing the Concrete for Perfect Consistency
Before you start, make sure you’re in a well-ventilated spot—your balcony open to the fresh air is perfect. Put on a pair of gloves and a dust mask to keep the fine particles out of your lungs.
Grab your mixing container and pour in the dry concrete mix. You don’t need to sift or anything fancy; just break up any large clumps with your hand or trowel. If you’re planning to make several pots, it’s easier to mix batches one at a time rather than trying to do it all at once.
Now, gradually add water while stirring steadily. A trowel or a sturdy stick works well. The goal is a thick, uniform paste that’s easy to pour but not runny. Think of peanut butter—it should hold its shape for a moment when you scoop it up, then slowly slump. If it’s too stiff, add a splash more water; if it’s soupy, sprinkle in a bit more dry mix. Err on the side of thicker rather than thinner for better mold detail.
If you want to add color, this is the moment. Concrete pigments are highly concentrated, so start with a tiny pinch and mix thoroughly. Dip a plastic spoon or stick into the mix and pull it out to see the true shade—wet concrete looks a little darker than the final color. Add more pigment bit by bit until you’re happy. Remember, a little goes a long way, and you can always test a small dab on scrap paper.
Finally, don’t linger. Concrete begins setting the moment you wet it, so aim to mix only what you can pour into your molds within 10–15 minutes. Keep an eye on the clock, and if you’re working solo, smaller batches are your friend. A smooth, lump-free mix now will reward you with crisp, professional-looking planters later.
Pouring and Curing Your Concrete Planter
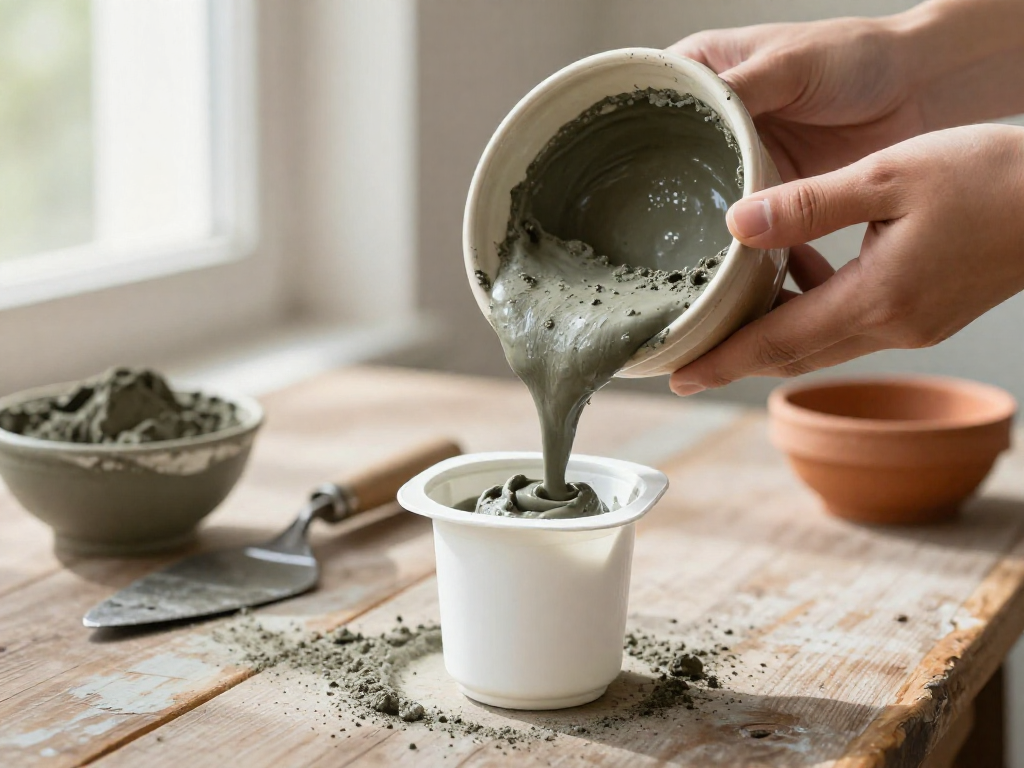
With your molds prepped and concrete mixed to a smooth, oatmeal-like consistency, it’s time for the magic pour. Scoop or spoon the mixture into your prepared outer mold until it’s about halfway full. This gives you room to position the inner mold without overflowing.
Next, gently tap the sides and bottom of the mold against a sturdy surface—like a table or the floor—to release trapped air bubbles. You’ll see small bubbles rise to the surface. This step really helps prevent unsightly pinholes in the finished planter.
Now take your inner mold (the one creating the planting cavity) and slowly press it down into the center of the wet concrete. As you push, the mix will rise around the edges. Keep pressing until the inner mold sits at your desired depth, leaving at least 1/2 inch of concrete at the bottom for drainage-hole drilling later. If the inner mold tries to float back up, weigh it down with a clean stone or a small heavy object on top.
Curing is where patience pays off. Place the filled mold in a warm, dry spot and leave it completely undisturbed for 24 to 48 hours. In very dry air, loosely cover it with plastic wrap to slow moisture loss and prevent cracking. After curing, the concrete should feel cool and hard to the touch, and it’s ready for demolding. Resist the urge to poke or peek—letting it set fully ensures a strong, durable planter for your balcony garden.
Demolding, Finishing, and Sealing
After the concrete has fully cured (typically 24–48 hours), it’s time for the big reveal. Start by removing the outer plastic mold. If you used a flexible plastic container, you can often peel it away carefully. Sturdier molds may require cutting along the sides with a utility knife. Take your time to avoid scratching the planter, and remember that the plastic can often be recycled or repurposed for your next project.
Next, focus on the inner mold. Gently twist and pull it free. If it’s stuck, don’t force it—try inserting a pair of pliers to grip and wiggle, or carefully cut the plastic away in sections. Any remnants can be snipped and pulled out.
Once both molds are removed, you’ll probably notice some rough edges or uneven spots. Use medium-grit sandpaper to smooth the rim, corners, and any sharp areas. A quick rinse under water removes the dust, then let the planter dry completely.
For extra protection against rain and sun, consider applying a penetrating concrete sealer. Brush it on following the product directions, and let it cure for at least 24 hours before adding soil and plants. This step is optional but can help your handmade planter withstand the elements on your balcony.
Styling Your Modern Concrete Planters on a Balcony
Your handmade concrete planters deserve a spotlight that matches their modern, sculptural vibe. Start by creating a little vignette—arrange a few planters of different sizes and shapes close together on a low wooden shelf or along a sturdy ledge. The mix of heights and forms draws the eye and turns a simple grouping into an intentional design moment. Play with asymmetry: a tall cylinder planter next to a shallow bowl planter, perhaps with a trailing plant spilling over one edge.
When choosing plants, think crisp geometry and bold textures. Architectural beauties like snake plants, aloe vera, and rosette-forming echeveria echo the clean lines of concrete while adding life and movement. Their sculptural leaves pop against the raw, matte finish, creating a high-contrast look that feels both urban and natural. For a softer touch, try a feathery asparagus fern or a cascade of string-of-pearls—the delicate greenery makes the planter’s solidity shine.
Balance the industrial feel with a handful of accents that add warmth. Tuck a small wooden coaster under one planter, set a burnished metal trinket dish nearby, or drape a linen runner across the shelf. These layers keep the space from feeling cold and invite your personal style into the arrangement. You can also hang a tiny brass-framed mirror behind the grouping to reflect light and make a small balcony feel airier.
When you photograph your setup, aim for diffused natural light—an overcast morning or indirect afternoon sun works beautifully. The soft light will highlight the planter’s subtle texture and smooth curves without harsh shadows. Frame your shots to capture the interplay of materials: concrete, wood, metal, and living greenery. And don’t forget to share the story behind each piece. Captions like “From yogurt tub to modern balcony planter” not only celebrate your crafty side but also inspire others to try upcycling. Every planter becomes a conversation starter, a badge of creativity in your urban oasis.
FAQ
What kind of plastic containers work best as concrete molds?
Sturdy, smooth-sided plastic containers like yogurt tubs, deli containers, or clean plastic plant pots work well. They should have a slight taper for easy demolding, and a coat of cooking spray or release agent helps the concrete pop out cleanly.
Is it safe to plant directly into these concrete planters?
Concrete can leach lime and raise soil pH, so cure the planter by soaking it in water for a few days before use. For most ornamental plants, direct planting is fine afterward, but consider a plastic liner for acid-loving plants or edible crops.
How do I prevent the concrete from cracking?
Mix the concrete to a thick, oatmeal-like consistency and tap the mold firmly on a hard surface to eliminate air bubbles. Cover the filled mold with plastic and let it cure slowly for at least 24 hours before demolding, then keep it damp for a few days.
Can I make larger planters using this method?
Yes, but larger planters need reinforcement like wire mesh or fiberglass to handle the weight and stress. Choose sturdy molds that can support the heavy concrete, and keep in mind that larger pieces may be too heavy for some balconies.
How long do handmade concrete planters last outdoors?
With proper curing and an optional concrete sealer, they can last for many years. They're durable and weather-resistant, though freeze-thaw cycles in colder climates may cause surface wear over time.